Prerequisites
- First, you’ll need a Parea API key. See Authentication to get started.
- For any model you want to use with the SDK, set up your Provider API keys.
How to deploy a prompt
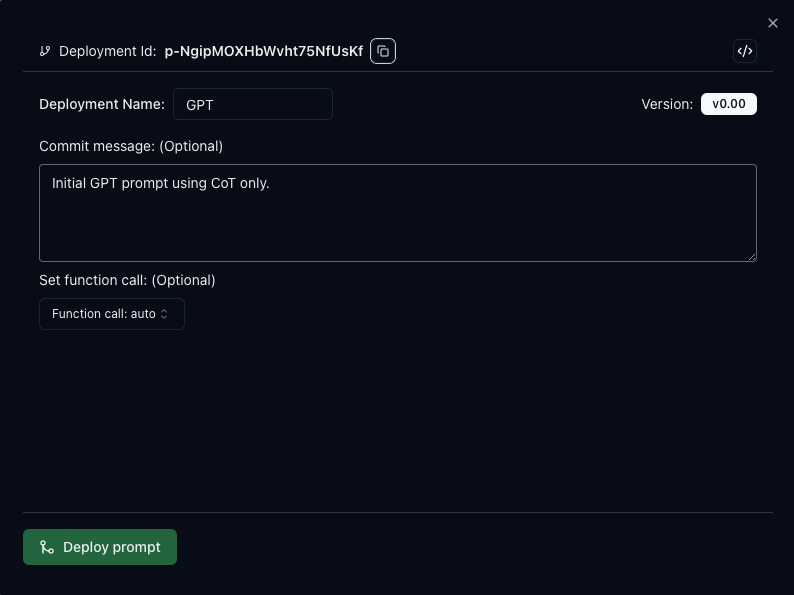
Visit the Playground to view or create prompts. After testing your prompt, you can click the blue rocket icon to deploy it.
Bumping / Revert a deployment
In the Playground, if a prompt has been previously deployed, and you click the rocket icon on a new version, you will be prompted to confirm whether to bump (if the current version is > than the deployed) or revert (if the current version is < than the deployed) the deployment. (You could also create an entirely new deployment with a new deployment name and ID.)
A/B test, or QA a prompt
Sometimes you may want to have two branches of the same prompt. One for production, and one for testing. With the drop-down menu, when bumping or reverting a deployment you can choose which branch should change.
Common Workflow:
- Deploy prompt v0 to dev and test using experiments
- After you are happy with performance, deploy the same prompt version as a new prod branch
- Continue to iterate on the dev branch by selectively bumping or reverting that branch only
- When ready, bump the prod branch to the latest and greatest version
How to use a deployed prompt
You can interact with your deployed prompts in two ways. Use the prompt directly or fetch the prompt’s data to use in your code.Use deployed prompt
Using the completion endpoint, you can set thedeployment_id
parameter and provide the prompt template inputs.
Fetch deployed prompt
You can fetch the prompt data and utilize it in your code using the get deployed prompt endpoint. The response will include the raw prompt and the prompt filled in with the provided inputs and other metadata. If you fetch a deployed prompt to use with your own LLM API, but still want traced logs associated with the deployment, you can either add
deployment_id to the trace decorator, or use trace_insert({"deployment_id": "p-PSOwRyIPaQRq4xQW3MbspVz"}) in your code.Response Object
Response Object
Deployments Dashboard
On the Deployments tab you can get a list of your deployments and associated information. Clicking an item will open a detailed view of your prompt and dashboard specific for that deployment.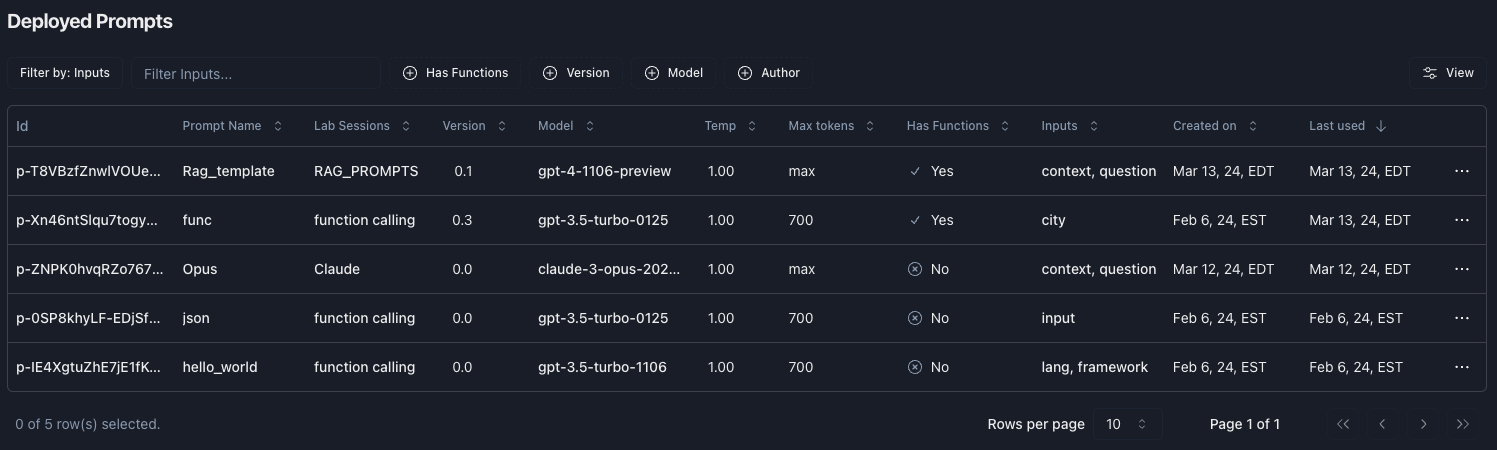
Detailed Deployment View
The detailed deployments page has two tabs. Prompt and Dashboard.Prompt
On the prompt tab you can view all of the prompt’s parameters including the messages and any attached functions. You can also access the history of the deployment and bump or revert to a different version. By clicking ‘Edit’ you can jump to the Playground and make changes to the prompt and deploy a new version.
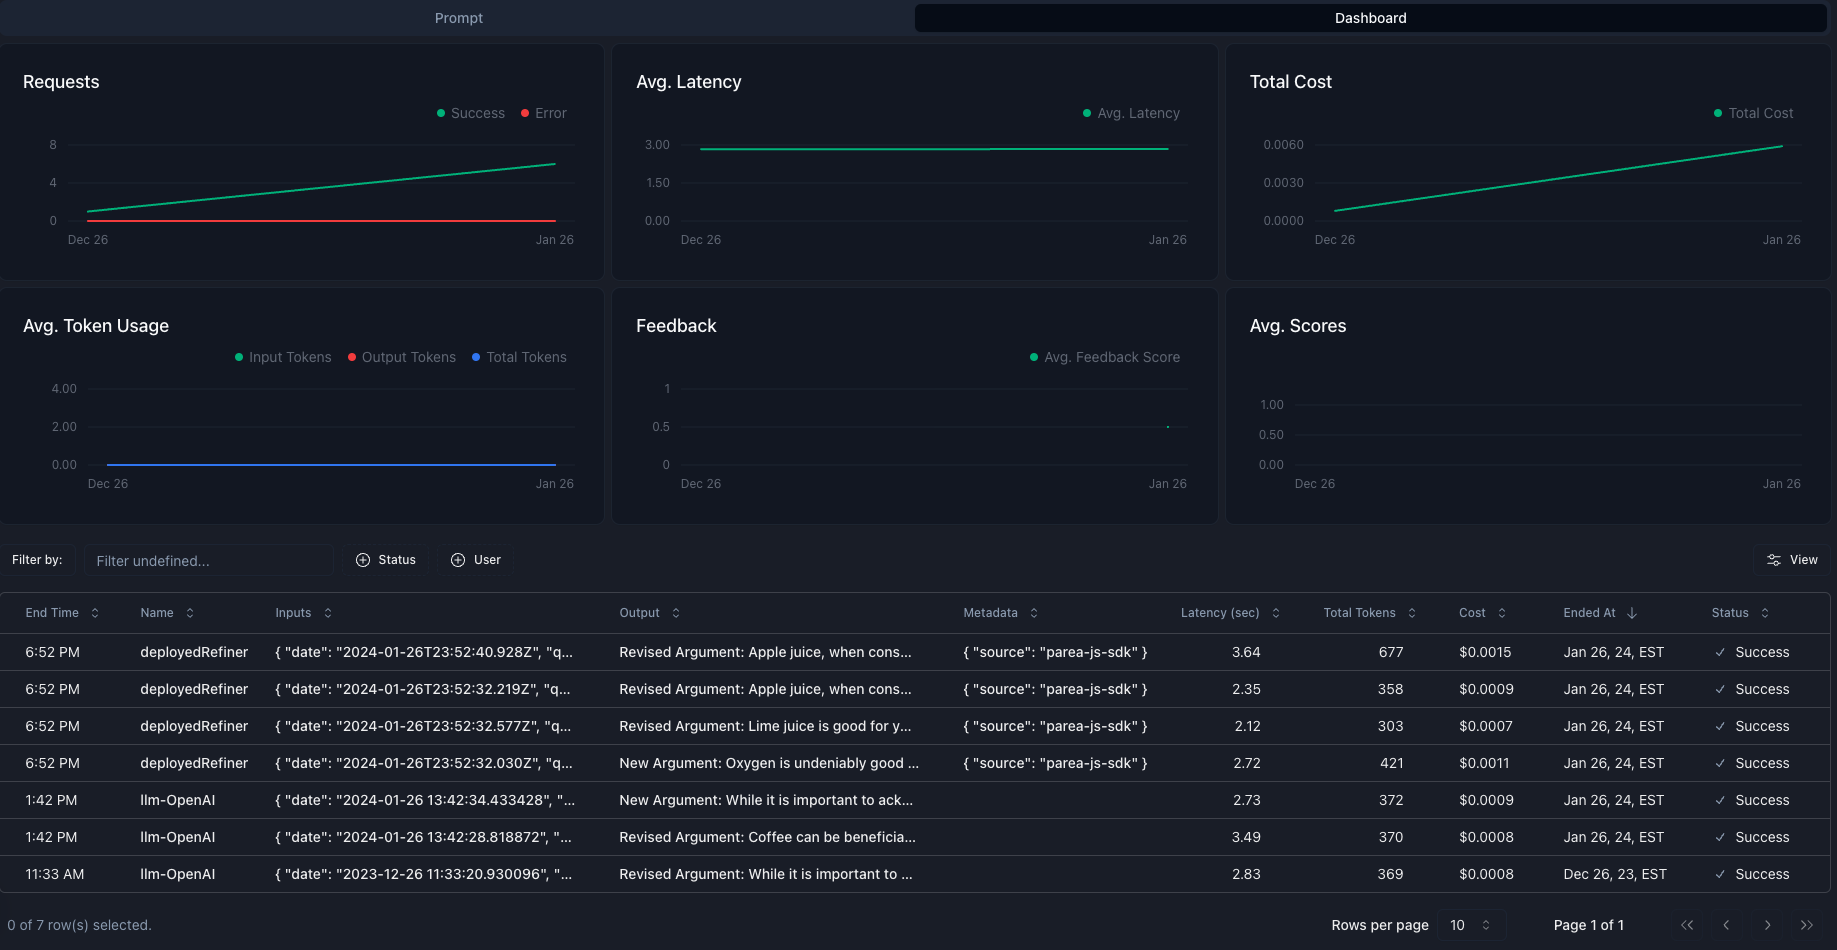
Dashboard
On the dashboard tab you can see the prompt’s usage statistics and trace logs. By clicking any trace you can view the full detailed trace.