Annotation queues are a user-friendly way to quickly cycle through and annotate multiple data.
Adding Logs to the Queue
When viewing any logs table you can select multiple logs from any log table and click the “Send to Annotation Queue” button to send them to the queue, or
 Or you can click the … button on a single log and select “Annotation queue.”
 When viewing a detailed trace log, you can click the “Send to Annotation Queue” button then select an existing queue or create a new one.

Viewing the Queue
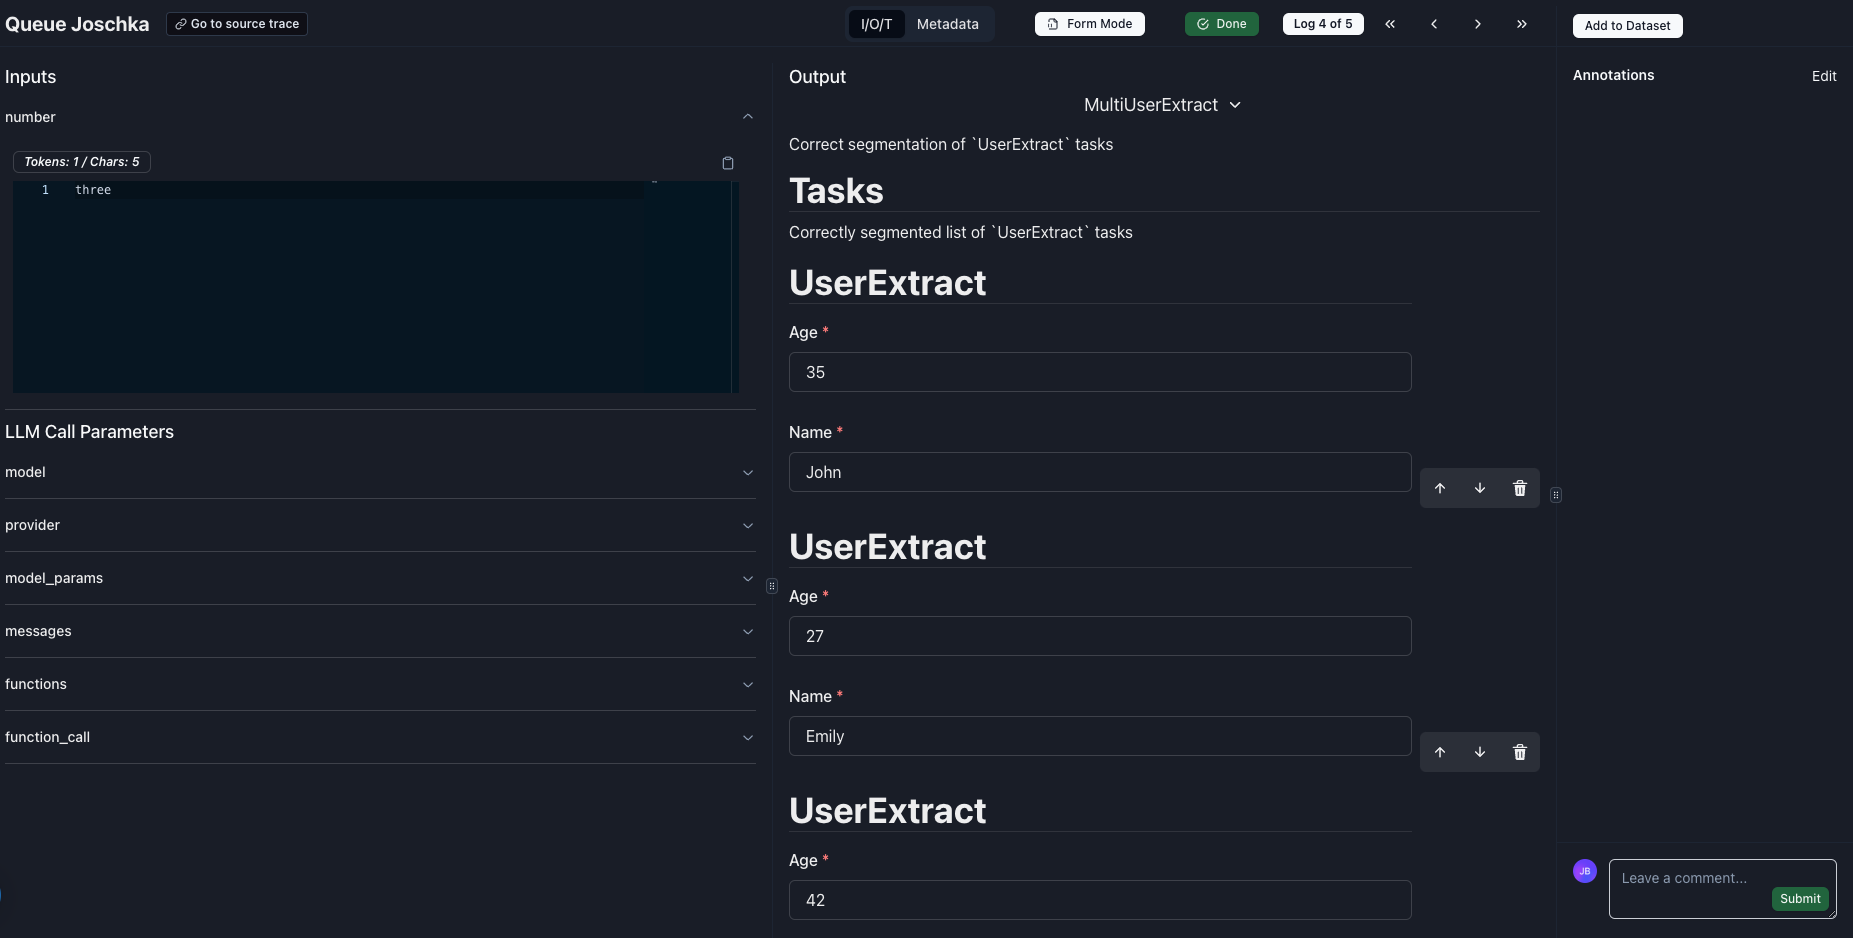
When you open a queue on the Annotation Queue page, you will see the inputs, outputs, and targets for logs in the queue.
On the sidebar, you will be able to add/edit annotations.
You can navigate forward and backward through the queue with the navigation buttons.
Once you’re done annotating a specific log item, you can click the “Done” button.
Clicking Done will remove the log from the annotation queue and advance to the next log in the queue.

Labeling in the Queue
As you navigate through the annotation queue, you can edit the inputs and output to add labeled samples to datasets.
This is useful when you want to reuse the data as targets in evaluations or to fine-tune a model based on (corrected) outputs.
For that you will either need to select an existing dataset or create a new one (1st screenshot).
Then you can add the sample by clicking “Add to dataset” (2nd screenshot).

 To simplify labeling of function calling / tool use responses by subject-matter experts (SMEs), one can turn the output of the LLM into a form by clicking on “Form Mode”.
Then, the SMEs can fill out/correct the respective fields in the form which has built in validation.
You can then use these data to fine-tune models for data extraction or agents which rely on tool use.
 Note, Form Mode is currently only available when sending LLM calls to the annotation queue.
This means that you will see all the LLM inputs.
You can “clean up” the queue interface by using templated LLM calls to only display the prompt template key-value pairs on the left side.
See below:


